You guys. I don't know if you know this about me - because I have been suppressing it these past few months in favor of long days in the library and long nights with my nose in a book - but I really am a creative person. So, when I saw
these cute hand warmers on my Etsy news feed (did you know Etsy even
had a news feed? Me neither...), my normal thought of "Hey, I could make that." turned into a resounding "I am GOING to make that. Tonight." Plus, Mad has been absolutely awesome lately (...
always...) and I wanted to do something nice for her...
...especially since wintumn is just descending upon us and she gets cold super easily.
So! Even though no part of this blog is a crafting blog, gird up your loins and get ready.
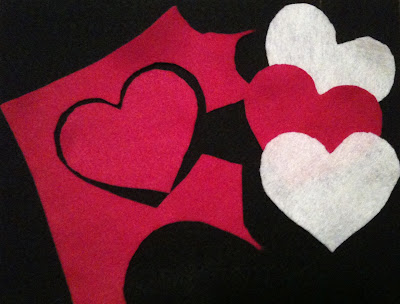
Step 1: Cut out felt hearts (or stars, or monkeys, whatever...). You want them to be a little bigger than the size of your palm.
(You need 4 total - 2 for each hand.)
Step 2: Gather your Bondex iron-on letters...
...and your iron. (Set it to the cotton setting and make it so the steam is off or it will ruin the felt.)
Step 3: Cut out the letters you're going to use. I did Madie's initials, with red initials on the white felt and black initials on the red felt. Place them where you want it on the felt and then put a piece of thin cotton (I used one of my cotton button-down shirts) over the felt/letters to protect it from burning. Press down for 30 seconds and then let the fabric cool to the touch.
Step 4: Carefully (ie. slowly) pull the paper backing off of the letters.
Step 5: Get out your needle and thread. (I whipstitched the hearts together because I like the home-made feel of it and I love the contrasting red thread with the cream felt...but if you prefer something a bit more professional-looking, then do the professional thing, turn the suckers inside out, sew it and flip 'em back out.) Remember to leave a whole for the rice to go in. NOTE: I thought I was going to be all smart and just use hot glue for this project. Then I thought about it - these are going into the microwave. Just sayin'.
Step 6: Get your rice and fill the heart envelopes about 85% of the way. Make sure you move the rice around when you're filling so you don't have weird pockets of emptiness. Also, I took an index card and created a little funnel... but only after I had already ended up with a lap full of rice.
Step 7: Finish the stitch!
To use, you just pop these cute little hearts into the microwave for 1 minute and then into your coat pockets.
Word to the wise: all my friends all over the globe might be receiving these for Christmas.